The previous owner had done quite a bit of work apparently but I suspect the last coats of varnish were a bit rushed as this summer has resulted in flaking and yellow discoloured patches across quite a lot of the woodwork.
I've included a few pictures here to show you the 'before' state as at November 2013:
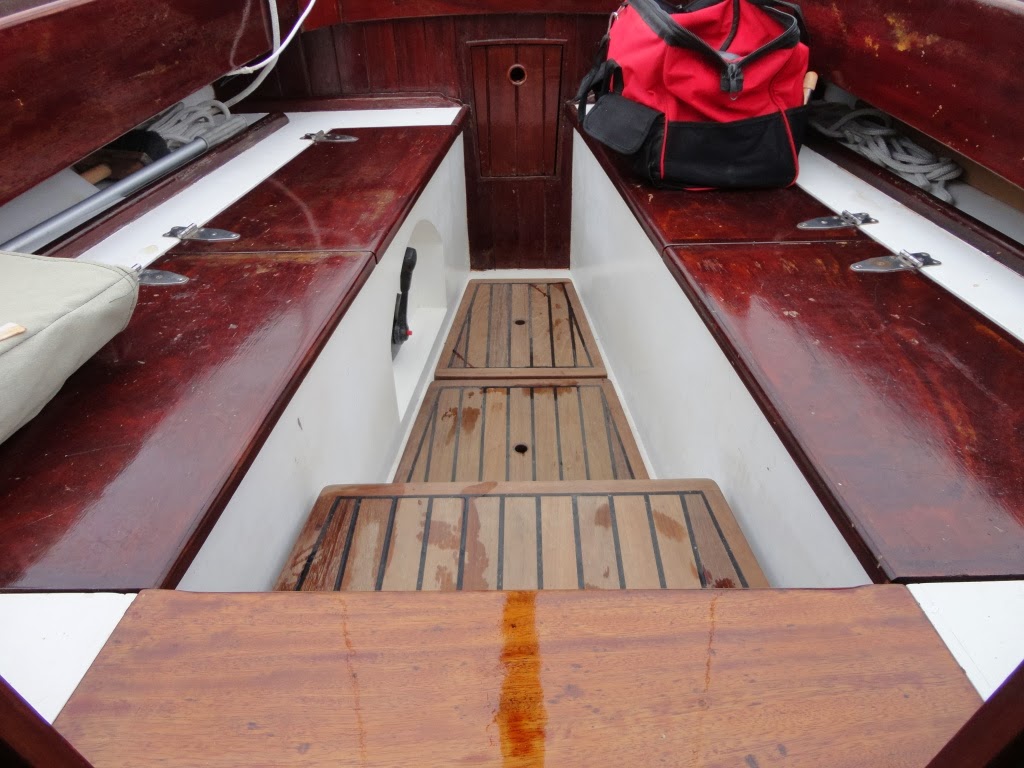 |
| Photo 1 - the starting point.. |
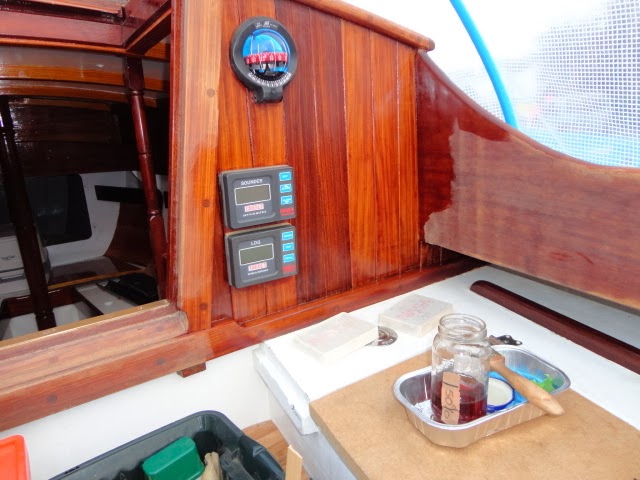
 |
| Photo 2 - showing the discolouration.. |
 |
| Photo 3 - blistering on the locker covers... |
 |
| Photo 4 - the panelling at the stern of the cockpit ...... that will be fiddly..... |
 |
| Photo 5 - Cockpit at the bow end with washboards removed .. |
We've removed the locker covers that you can see in photo 1 above, replaced them temporarily with MDF cut to shape and taken them home to work on. I'm reporting the work done on those through a separate page. Link to Locker Covers.
We've started the painful task of stripping the varnish back to the wood. Having originally planned to use a heat gun I've found a 'Harris' paint and varnish stripper tool that is actually doing a good job of gettting the 'loose' top layers off.
 |
| The 'Harris' scraper that's earning it's money... |
 |
| The MDF locker tops and temporary washboards....lino covering the bilge covers to protect them.. |
 |
| Working on a section at a time...... |
 |
| The outer cockpit sides are coming up a treat..... |
01/12/2013......One week later and we've moved on a little further. Yesterday at home in the garage I got time to strip down one of the lockers covers using the heat gun and sandpaper finish.........three to go...... See link to Locker Covers
Today down at the boatyard our efforts yielded the stripping and sanding of one of the cabin sides, more sanding of the panelling in the cockpit and the removal of the cupboard doors in our small galley (another small job to do at home...)
The cabin side that I managed to do today stripped very easily, mainly due to the fact that there was only a thin layer of varnish to be removed. Luckily it wasn't windy so our neighbouring boats stored up alongside us didn't get covered in varnish dust!
I considered taking the verdigris off the portholes but decided not to.........far too much trouble to maintain a shiny finish and wouldn't look right (in my opinion....).
 |
| Cabin side mid stripping |

The other half worked on sanding in the cockpit with the harris scraper and 60 grit sandpaper. Slowly getting there but the stained varnish is proving a bit of a pain....
02/02/2014
After several weeks of bad weather we eventually got to the stage where everything was sanded down to bare wood as far as we reasonably could, finished to 150 grit and first coat of 50% varnish applied. We're really pleased with this first coat as it gives us an idea of how it will look eventually. The great thing is that we can now really see the woodgrain and true beauty of the carpentry that was missing under all the previous varnish.
.JPG)
.JPG)

The rear locker cover is being worked on at home in the garage ..... just hoping it varnishes up the same colour as the rest of the cockpit where it fits ....
 |
| 1st Coat - 75% |
 |
| 2nd Coat - 85% |
Sanded cabin sides and cockpit to 180 grit, then applied 2nd coat of varnish (75%). There are areas of the cabin sides and cockpit that look 'dry' after this application but I'm not worried about this as the wood is clearly still taking up the diluted varnish to seal. I would be more worried if the varnish wasn't laying on well. The green masking tape I'm using is called Frog Tape - it's a little more expensive but really does do the job in protecting the decking and peels off easily even after a week (or did for me anyway....).
Photo's of today's efforts below:

.JPG)
.JPG)
.JPG)
.JPG)
22/02/2014
Sanded to 180 grit and 3rd coat of Epifanes varnish applied. Now at 85% dilution.
 |
| 3rd Coat on cabin side |
 |
| 3rd coat for cockpit |
.JPG) |
| Enjoying the detail we're now beginning to see |
01/03/2014Sanded with 180 grit and fourth coat of varnish, now at full strength! Reflections are beginning to sharpen as the wood grain is being levelled out.
 |
.JPG)
.JPG)
.JPG)
09/03/2014
Varnished on one of the warmest days of winter so far (15 degrees) ... a new one for me!
I've included close ups to show you that the mirror finish is getting there but still a couple of coats away. I'm not too worried about runs at this stage as the name of the game is getting microns of varnish laid down - runs sand out before the next coat.
 |
| 5th Coat of Epifanes |
 |
| Close up shows you it's not perfect yet! |
 |
| A rare view of the front of the cabin; first time the winter cover has been completely back to enable me to see it properly! |
Final 7th coat of Epifanes brings me to a close on varnishing; I applied this two weekends ago in order to make sure it had a good chance of curing well before going back in the water in two days time. In truth I'm not entirely happy with this last coat as the varnish didn't seem to lay on as well as normal I would have been hard pressed to get the real mirror finish on a vertical surface (my excuse anyway).
Also, the white surfaces in the cockpit have been sanded down, undercoated with International's Pre-Kote and top finished with Toplac.
.JPG) |
| 7th Coat of Varnish |
 |
| 7th Coat and Toplac refurbished on the sides |
 |
| Cockpit varnished and Toplac applied |
 |
| Tiller and Rudder installed - nearly there! |
Locker Covers re-installed and cockpit is now complete!

Loving this blog. I have an equivalent boat in Maine, a 1976 26' double ender and she has a similar story of love but not enough use.
ReplyDeleteIn Maine we have a colder winter so everything that can be taken off has been and brought home to work on in my small shop. Your attention to detail in scraping and sanding is admirable. Very glad you didn't polish the portholes, they look much better green!
Hi Nibbler, thanks for your comment - really pleased to hear you enjoyed the blog. Best of luck with the work you're doing with your own boat.
ReplyDeleteThe debate about the portholes rumbles on as we had someone again yesterday asking when we were cleaning them up! Don't worry, they're staying as they are - far less maintenance and nicer looking!